If you want to upgrade your firearm’s handguard, installing a triangle handguard with collar is an excellent choice. Known for its durability and sleek design, this handguard enhances functionality and aesthetics. This guide will provide a detailed, step-by-step procedure for installing a triangle handguard with collar, ensuring a secure and proper fit.
What is a Triangle Handguard with Collar?
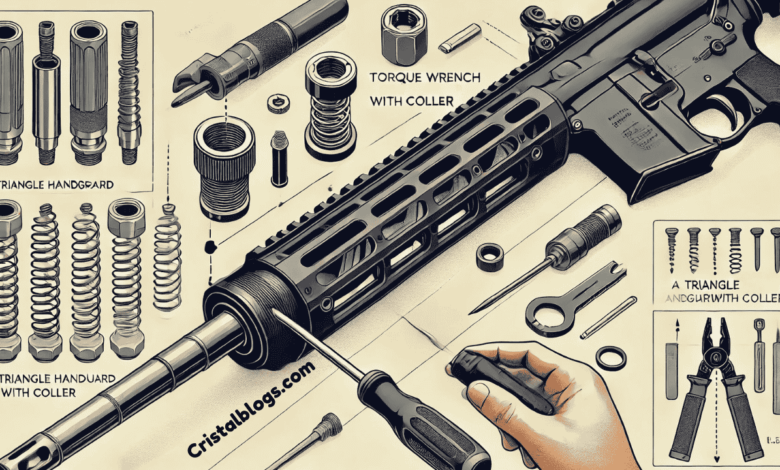
A triangle handguard is a protective covering that surrounds the barrel of your firearm. It offers a secure grip, heat dissipation, and a robust appearance. The collar, also known as the handguard cap, acts as a support structure, keeping the handguard in place and aligned. Together, they provide stability and improved handling during use.
Benefits of Installing a Triangle Handguard with Collar
- Enhanced Durability: Triangle handguards are typically made from high-quality materials, ensuring long-lasting performance.
- Improved Grip: The ergonomic design offers a comfortable and secure hold.
- Aesthetic Appeal: The sleek design adds a classic look to your firearm.
- Customization: Many triangle handguards are compatible with various accessories, such as rails and mounts.
Tools and Materials Needed
Before beginning, gather the following tools and materials:
- Triangle handguard
- Collar (handguard cap)
- Screwdriver set
- Torque wrench
- Punch set
- Barrel nut wrench
- Gloves (optional for added grip and protection)
- Firearm cleaning kit (optional for cleaning during the process)
Step-by-Step Installation Guide
Prioritize Safety
Before beginning any firearm modification, ensure your firearm is unloaded:
- Remove the magazine.
- Check the chamber to validate it is empty.
- Keep the gun aimed in a secure direction at all times.
Disassemble the Existing Handguard
- If your firearm already has a handguard, remove it carefully. Depending on the design, you may need to unscrew or detach specific parts.
- Use a punch set to remove any retaining pins if necessary.
- Take note of the barrel nut and gas block, as these components are crucial for securing the new handguard.
Install the Collar
- Slide the collar (handguard cap) over the barrel. Align it correctly with the gas block or front sight base.
- Ensure it sits flush against the barrel nut. The collar serves as the foundation for the triangle handguard.
Position the Triangle Handguard
- Slide the triangle handguard into place, aligning it with the collar and barrel nut.
- Ensure the handguard fits snugly over the collar. Adjust as necessary to obtain a secure fit.
Secure the Handguard
- Use the appropriate screws or fasteners to secure the handguard to the collar and barrel nut.
- Tighten the screws incrementally to avoid overtightening, which could damage the components.
- Use a torque spanner to apply the manufacturer-recommended power for a secure fit.
Perform Final Checks
- Inspect the installation to ensure the handguard is firmly in place.
- Check for any movement or looseness.
- Perform an essential function test to confirm the firearm operates smoothly.
Tips for a Successful Installation
- Follow Manufacturer Guidelines: Always refer to the instructions provided by the handguard manufacturer for your firearm model.
- Use Quality Tools: High-quality tools can simplify the process and prevent component damage.
- Consult a Gunsmith: If you’re unsure about any step, seek assistance from a professional gunsmith.
Common Challenges and Solutions
Misalignment of the Handguard
- Problem: The handguard doesn’t align with the barrel or collar.
- Solution: Ensure the collar is positioned correctly and recheck alignment before securing.
Loose Fit
- Problem: The handguard feels loose after installation.
- Solution: Tighten the screws or fasteners to the recommended torque. Replace worn or damaged components if necessary.
Difficulty Removing the Old Handguard
- Problem: The existing handguard is challenging to remove.
- Solution: Use penetrating oil to loosen stubborn screws or pins. Apply steady pressure with the appropriate tools.
Maintenance and Care
Once installed, proper maintenance ensures the handguard remains functional:
- Regular Cleaning: Clean the handguard and collar periodically to remove dirt and debris.
- Inspect Fasteners: Check the screws and fasteners regularly to ensure they remain tight.
- Avoid Overexposure to Heat: Prolonged exposure to excessive heat can weaken certain materials. Allow the firearm to cool after extended use.
FAQs
Can I install a triangle handguard without a collar?
No, the collar is essential for supporting and securing the handguard. Attempting to install it without a collar can lead to misalignment and instability.
Are triangle handguards compatible with all firearms?
Not all triangle handguards are universally compatible. Check the specifications to ensure compatibility with your firearm model.
Is professional installation necessary?
While the installation can be a DIY endeavour, consulting a gunsmith is recommended if you’re inexperienced or unsure about the process.
What materials are triangle handguards made from?
Triangle handguards are typically made from aluminium, steel, or polymer, depending on the manufacturer and design.
Conclusion
Installing a triangle handguard with collar is a practical upgrade for enhancing your firearm’s functionality and appearance. Following this step-by-step guide can achieve a secure and professional-quality installation. Always prioritize safety, use the right tools, and consult experts when needed. With proper care and maintenance, your new handguard will serve you reliably for years.